Preparing Your Home for Interior Painting
- 89wolfslane
- Oct 20, 2025
- 4 min read
Painting your home’s interior is an exciting project. It breathes new life into your space and reflects your style. But before you dip your brush into that fresh can of paint, there’s a crucial step you can’t skip: home painting preparation. Proper preparation ensures a smooth, long-lasting finish and saves you from headaches down the road.
In this guide, I’ll walk you through everything you need to know to get your home ready for a flawless paint job. Whether you’re tackling a single room or your entire house, these tips will help you achieve professional results.
Why Home Painting Preparation Matters
Preparation is the foundation of any successful painting project. Skipping or rushing this step can lead to peeling, uneven color, and wasted time and money. When you prepare your walls and surfaces properly, the paint adheres better and lasts longer.
Here’s what good preparation does for you:
Ensures smooth surfaces free of dirt, grease, and imperfections.
Protects your furniture and floors from paint splatters.
Helps you identify and fix damage like cracks or holes before painting.
Saves time by preventing the need for multiple coats or touch-ups.
Think of it like laying bricks for a house. You wouldn’t build on a shaky foundation, right? The same goes for painting your home.
Essential Steps for Home Painting Preparation
Getting your home ready for painting involves several key steps. Let’s break them down so you can tackle each one confidently.
1. Clear the Room and Protect Your Belongings
Start by removing as much furniture as possible from the room. If some pieces are too large to move, push them to the center and cover them with drop cloths or plastic sheeting. Don’t forget to protect your floors with canvas drop cloths or old sheets.
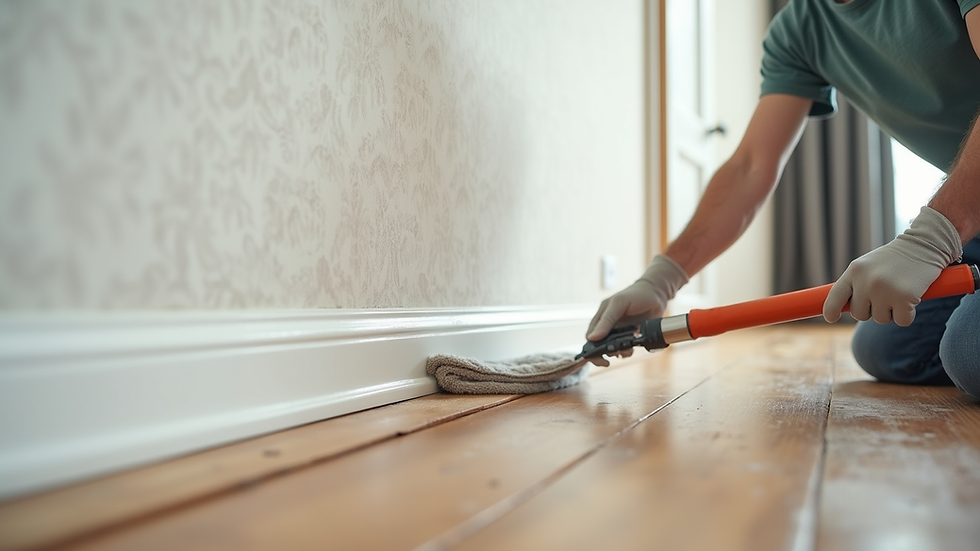
2. Clean the Walls Thoroughly
Walls accumulate dust, grease, and grime over time. Use a mild detergent mixed with water and a sponge to wash the surfaces. Pay special attention to kitchen and bathroom walls where grease and moisture build up. Rinse with clean water and let the walls dry completely.
3. Repair Any Damage
Inspect your walls for cracks, holes, or dents. Use spackling compound or wall filler to patch these areas. For larger holes, you might need a patch kit. Once dry, sand the repaired spots smooth with fine-grit sandpaper.
4. Sand the Walls Lightly
Even if your walls look smooth, a light sanding helps the new paint stick better. Use a sanding block or pole sander with fine-grit sandpaper. After sanding, wipe the walls with a damp cloth to remove dust.
5. Remove or Tape Off Fixtures and Trim
Take down switch plates, outlet covers, and curtain rods. Use painter’s tape to mask off window frames, door trim, and baseboards. This step keeps your paint lines clean and professional-looking.

Can I Paint Over Existing Interior Paint?
This is a common question, and the answer depends on the condition and type of your current paint.
If the existing paint is in good condition, clean, and not peeling, you can usually paint right over it. Just make sure to sand lightly to create a rough surface for better adhesion.
If the paint is peeling or flaking, you must remove the loose paint first. Scrape off peeling areas, sand the edges smooth, and repair any damage before painting.
If the old paint is oil-based and you want to use latex paint, you’ll need to prime the surface first. Oil and latex paints don’t bond well without a primer.
If you’re painting over a dark color with a lighter one, consider using a primer or a paint with good coverage to avoid multiple coats.
Taking these steps ensures your new paint job looks fresh and lasts for years.
Choosing the Right Tools and Materials for Preparation
Having the right tools makes preparation easier and more effective. Here’s what I recommend:
Drop cloths and plastic sheeting to protect floors and furniture.
Painter’s tape for clean edges.
Spackling compound and putty knife for repairs.
Sandpaper (120-220 grit) and sanding blocks.
Mild detergent and sponge for cleaning.
Primer if needed for tricky surfaces or color changes.
Paint scraper for removing loose paint.
Investing in quality tools pays off with a smoother process and better results.
Final Tips for a Successful Paint Job
Before you start painting, keep these tips in mind:
Work in a well-ventilated area to help paint dry and reduce fumes.
Check the weather if you’re painting near open windows or doors. High humidity can slow drying.
Use a quality primer when necessary to improve paint adhesion and coverage.
Plan your painting order: ceilings first, then walls, then trim.
Keep a damp cloth handy to quickly clean up any drips or mistakes.
By following these guidelines, you’ll set yourself up for a smooth, enjoyable painting experience.

Bringing Your Vision to Life with Paint Lab Painting
Preparing your home for painting is the first step toward transforming your space. If you want to skip the hassle and ensure expert results, consider partnering with professionals who understand the importance of preparation and craftsmanship.
At Paint Lab Painting, we specialize in helping homeowners in NY and CT achieve their dream homes with exceptional service and attention to detail. Whether you’re refreshing a single room or undertaking a full renovation, we handle every step with care.
Ready to start your interior painting project? Let us help you bring your vision to life with precision and style.

Your Next Steps for a Beautiful Home
Now that you know how to prepare your home for painting, it’s time to get started. Remember, preparation is the key to a flawless finish. Take your time, gather your tools, and follow the steps carefully.
If you want to ensure a high-end, reliable painting experience, don’t hesitate to reach out to experts who can guide you through the process. Your dream home is just a brushstroke away.


Comments